Tuesday, December 9, 2008

Construct Knowledge and Nurture Creativity
Education Theory and Case Studies


Construct Knowledge and Nurture Creativity

Education Theory and Case Studies


Eugene J. Zhang

Former NASA engineer, Author of "Young Robotics Engineer"

International Robot Olympiad Committee Member

Managing Director - Semia Technology Limited


I. INTRODUCTION


We are living in a time of deep structural change which brings with it tremendous promise and hope for possibilities never before realized. Technological advances in computing, telecommunications, medicine have changed our society in profound ways. This has enabled previously unthinkable concepts such as virtual corporations of one person, situated perhaps anywhere in the world, working and producing better quality products at lower cost than industrial giants.


Compared with such tremendous changes, most countries education systems have remained virtually static, they all face with similar challenges: How to keep students interested in learning? What skill sets are required for students to face future challenges? How to introduce new technology courses to students? With increasing demands for life-long learning, our rapidly changing society no longer asks for the reproduction of knowledge but for ideas, creativity and new ways of thinking. What worked in 1950s would not work nearly as well today and will not work at all in the next decade.


This paper will first introduce famous scientists and research organizations regarding their views on learning and their recommendations for education system reforms. Then it will outline the current problems experienced by students in Asia. Finally the paper will provide examples of how some countries plan to revamp their education systems, and specific case studies of how creativity is developed with innovative teaching methods and materials.


II. INTRODUCTION OF FAMOUS SCIENTISTS AND LEARNING CONCEPTS


Next Generation Forum (NGF)

NGF is a fully independent network of experts, knowledge and practice in the field of creativity and learning. It is an open platform where anyone with an interest in children’s development and imagination can share ideas and benefit from coordinated research and initiatives. NGF includes experts from all over the world, including Denmark, Germany, Japan, Malaysia, USA ... etc.


In 1999, NGF published its first annual report called "Toward a Creative Society". In the report NGF poses the central questions: How do we evolve into a Creative Society, in which imaginative individuals constantly invent new possibilities for themselves and their communities? How do we ensure that the natural curiosity to learn and divergent thinking of childhood extends long into adulthood? Beginning to answer them puts children, and the need to support their creativity, directly in the center of attention.


NGF defines the word "learning" in a broader sense to mean exploring and making sense of the world and the ability to do more things in it. In this sense we are all learning " not just in schools, but all the time. NGF suggests that children are born curious, with an instinct to learn, and unless something happens to them to stifle and deaden their curiosity, their desire to learn will last a lifetime. Thus, we must make learning a fun and interesting experience for children. NGF recommends schools to evaluate children’s "learn while play" method, and extend the practice into the classrooms in which play becomes integral part of formal learning.


NGF also recommends schools to put more emphasis on "learning how to learn", so that knowledge becomes less about acquiring information and facts and more about how to be creative in new and challenging situations. The 1999 report cites best practices examples from schools around the world.

Additional information: www.nextgenerationforum.org


Dr. Jean Piaget


Dr. Jean Piaget was a famous Swiss child psychologist. He was named by TIME magazine, along with Albert Einstein, one of the 20 most influential scientists in the 20th century. Dr. Piaget spent much of his life observing children, some barely old enough to speak, and through his studies he formulated a theory of how knowledge was developed in people’s minds. His theory inspired teachers around the world that children are not empty vessels to be filled with knowledge (as traditional pedagogical theory had it) but active builders of knowledge, little scientists who are constantly creating and testing their own theories base on their experience of the world . In one of his famous experiments, Dr. Piaget ask 5-7 year old children on what makes the wind, and children would reply the trees because they have seen trees wave their "arms" when it is windy, also children knew that by waving their own arms they can also generate wind. Thus, in their mind trees generated the winds and many trees can generate strong winds. These experiments let Dr. Piaget to conclude that children are always constructing theories from what they have learned already, and the automatic correction of teaching the child the right answer maybe undesirable. If child’s theory is always greeted with "Nice try, but this is how it really is".", after a while the child may stop trying to make their own theories. As Dr. Piaget puts it, "Children have real understanding only of that which they invent themselves, and each time that we try to teach them something too quickly, we keep them for reinventing themselves."


Dr. Seymour Papert


Dr. Seymour Papert is a professor at the Massachusetts Institute of Technology, USA. He worked with Dr. Piaget in Geneva in the late 1950s and early 1960s. Dr. Papert formed a theory of education called "Constructionism" based on Dr. Piaget’s theory of knowledge. Dr. Papert believed that since knowledge is actively constructed in the mind, then education should consist of providing opportunities for children to engage in creative activities that fuel this constructive process . As Dr. Papert has stated, "Better learning will not come from better ways for the teacher to instruct, but for giving the learner better opportunities to construct."


The details of Constructionism theory is as follows :


  • Learning happens especially well when children are engaged in constructing a meaning product, such as sand castle, a poem, a machine, a story, a piece of art work, a computer program, or a song.

  • When children are involved in creating something, making something, building something, they are simultaneously building knowledge in their minds. They are trying out ideas, making theories and testing them, making connections between them and reorganizing them " in short, they are building knowledge structures.

  • This newly formed knowledge enables chiLEGO Educational Division

    LEGO Educational Division designs learning tools for optimal learning through hands-on experiences. Working with "Constructionism", LEGO learning tools allow students to construct projects that are meaningful and related to their own real world experiences, and the building process allow students to construct knowledge.

    This "Learning by Making" method is based on the theory that things we experience with our body and hands are basis for developing our creativity and intelligence. LEGO Education defines "intelligence" is not something we possess, rather it is something we do. For example, if we think about an experiment of tying a bow in our shoelace, how did we do it? Can we take a piece of paper and adequately describe the process? How do children do it? In fact, children just do it without thinking about it in their minds, they think through their bodies. But adults forget how to do it. Adults have one system: first the head, then the body. Children, on the other hand, are equipped with an inclination to do the opposite: first the body, then the head. LEGO Educational Division ldren to build even more sophisticated constructions, which yields more knowledge" and so on, in a self-reinforcing cycle.


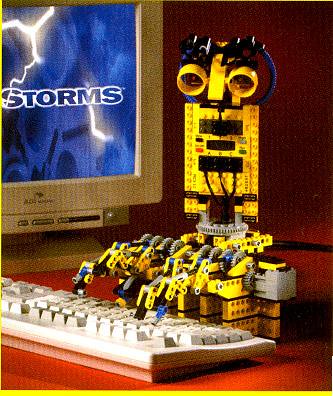
In the 1970s, Dr. Papert designed a computer programming language called Logo, which enabled children to use mathematics as building material for creating pictures, animations, music, games and other things on the computer. In the mid-1980s, members of his M.I.T team developed LEGO® TC Logo, which combined the computer language Logo with the LEGO construction material. LEGO TC Logo enables children to control the structures they build out of LEGO elements, make them move, or walk, or light up, or respond to outside environment. All these innovative learning materials are based on Dr. Papert’s Constructionism theory, making tools for children to construct knowledge in the classroom environment.


Dr. Papert was also instrumental in advocating the use of technology in schools in United States. In a report for the United States Congress in 1995, Dr. Papert presented the topic: "Technology in Schools: Local fix or Global Transformation?" In which he recommends the US government to do establish model sites for far-reaching changes in education methodology, challenge the technology industry to produce radically innovative low cost educationally oriented computational devices, and encourage the "ideas industry" to produce radically innovative new concepts of intellectually rich curriculum.


LEGO Educational Division


LEGO Educational Division designs learning tools for optimal learning through hands-on experiences. Working with "Constructionism", LEGO learning tools allow students to construct projects that are meaningful and related to their own real world experiences, and the building process allow students to construct knowledge.


This "Learning by Making" method is based on the theory that things we experience with our body and hands are basis for developing our creativity and intelligence. LEGO Education defines "intelligence" is not something we possess, rather it is something we do. For example, if we think about an experiment of tying a bow in our shoelace, how did we do it? Can we take a piece of paper and adequately describe the process? How do children do it? In fact, children just do it without thinking about it in their minds, they think through their bodies. But adults forget how to do it. Adults have one system: first the head, then the body. Children, on the other hand, are equipped with an inclination to do the opposite: first the body, then the head. LEGO Educational Division


believes that children are right, the things children experience with their body and hands are the basis for their knowledge development .


Psychologist professor Howard Gardner at Harvard University believes that we have no less than five intelligences, one of these is Bodily-Kinesthetic intelligence. The other four are Spatial, Musical, Linguistic and Logical/mathematical. All these intelligence are different ways of thinking, but they all work together. The things we learn with our Bodily-Kinesthetic intelligence are the basis for developing the other four intelligences.


The five intelligence are both separate and interdependent. Put in another way, the development of one intelligent is based on the others. But there is an order of event in the development process. In begins, first and foremost, with Bodily-Kinesthetic, Spatial and Musical. It is through these that language derives its meaning . Thus, developing Bodily-Kinesthetic and Spatial Intelligence are key factors in developing students creativity. Here is an example how playing with LEGO bricks develops five different intelligence sequentially:


  1. When playing with LEGO bricks, we are simultaneously developing our Bodily-Kinesthetic Intelligence.

  2. When children put bricks on top, or behind the other, their hands move around in space, and that requires, and develops Spatial Intelligence.

  3. This is also the child’s first encounter with situational words in language. Linguistic Intelligence such as action verbs are developed by first experiencing with Bodily-Kinesthetic intelligence.

  4. When children play with bricks, the process provides them with an awareness of numbers and quantity, thus developing Logical/Mathematical Intelligence.


Thus, LEGO Educational Division believes that education materials that best nurture creativity and optimize learning are those concrete materials that students can "feel", and must be meaningfully and closely connected to the student’s ordinary life. This building by hands of something meaningful to the students will in term construct the knowledge inside their minds.


III. CHALLENGES IN THE CURRENT EDUCATION SYSTEMS


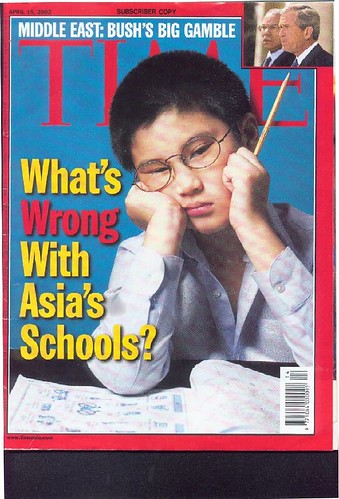
TIMES April 15, 2002 article on "School Daze" described the issues facing the Asian education system today - "What is wrong with Asia’s schools?" The TIMES articles notes that the foundation of East Asian economic miracle was built on hard work, high savings rate and belief in the value of education. And for years, Asia rest easy knowing that its school systems were producing the best and the brightest kids. Raising GDP were proof, so were national math and science test scores. All one has to do is walk into an Asian classroom, you can witness Asian students diligent, quiet, involving in copying down the daily lessons. It is nothing like the chaos, say, American schools .


However, the contrast isn’t so stark anymore. Recent math and science test scores show American students gaining ground on their counterparts in Asia. The Asian exam-based school systems are finding that even children who attend the very best public schools lack the creative skills to compete in the new economy. Researchers find that "Those students educated overseas are more independent, more aggressive, and more proactive in tackling problems". Also, in a poll of 20 countries, Asian students score 2nd lowest in enjoyment of math and science, even they score highest in these tests. No wonder so few Asians are willing to devote their lives into research when they graduate, they don’t want anything to do with the subjects that stifle their creativity when they were at school.


Even more alarming sign is that the drop-out rates have increased significantly in Asia: in 1999, a record 130,000 Japanese primary and junior high school students refused to attend school for more than a month. There is the towering degree of unhappiness among Asian Kids. In Hong Kong, 1 in 3 teens have had suicidal thoughts, up 28% from two years ago; Last October, seven-year-old Ng Dik-wai failed an exam in Chinese dictation, and went home and leaped out of his high-raise apartment, and became the youngest education victim in Asia . Similar kinds of situation can be found in Thailand and South Korea.


Parents in Asia are also taking their children out of the local education system. They no longer believe the education can provide them the secure job for life, hence they are dropping out of school all together or going aboard where countries invest more in education and classrooms sizes are smaller, and their children can obtain more attention ( See Tables Below)


Table 1.0 The Price of Education

Asia lags behind the rest of the world when it comes to spending on education ( % of GDP, 1999)


Table 2.0 The Class Room Size

Small classes, especially in early grades, lead to higher academic achievements, according to experts ( Number of students per teacher, primary school, 1998)


IV. SOLUTIONS TO THE EDUCATION CHALLENGES:


Top Level Policies:


Many governments and Ministries of Education are doing something about the current challenges. In April 2002, Japan will complete a radical restructuring, abolish Saturday classes, encouraging volunteerism and allowing schools to experiment with different curriculums. Later this year, Taiwan will scrap its university entrance exam in favor of an approach that considers grades, essays and extracurricular activities. In South Korea, up to a third of incoming college students will be picked not for their test scores but for their unique talents .


In a report for the United States Congress, famous MIT professor Dr. Seymour Papert presented the topic: Technology in Schools: Local fix or Global Transformation? In which he recommends the US government to do the following:


  1. Turning educational institutions that are under federal control into model sites for far-reaching change.

  2. Setting the sights higher in the formulation of national goals. For example,a minimal level for a significant national technology-in-schools goal should be more like "several networked computers in every classroom within three years and a computer for every student within six."

  3. Having the courage to support the idea that all assumptions about the content of the curriculum, the modes of learning and the structure of School are open to re-examination and radical replacement as we move into the digital era.

  4. Creating a challenge to the technology industry to produce radically innovative low cost (for example $200) high performance networked portable educationally oriented computational devices.

  5. Creating a challenge to the "ideas industry" to produce radically innovative new concepts of intellectually rich curriculum without constraints imposed only because they have always been there such as inclusion of traditional topics (e.g. fractions or formal grammar), segregation of learners by age (K, 1, 2 etc.) or artificial traditional divisions such as "science vs. math vs. writing" or "vocational vs. academic."

  6. Creating supportive conditions for visionary teachers (of which there are many) to "blow the whistle" about the deficiencies of "School as have known it" and join in the launching of a national debate about the future of the learning environment.


SPECIFIC CASE STUDIES

The following are innovative teaching methods and application of "Constructionism" theory to build knowledge and nourish creativity.


Case 1. -- Thailand


"Project Lighthouse, Guiding Pathways to Powerful Learning"


The Project Lighthouse was started in early 1997. A group of Thai industrialists, educators, and government officials had come to believe that the considerable economic success Thailand had achieved in the previous decade could not be sustained unless the education system could help develop students who could function productively in a global, knowledge-based economy . They furthered believed that trying to incrementally reform the school system would take too long, cost too much. Thus they approached Dr. Seymour Papert and his group at MIT Media labs to form a partnership in finding innovative ways of learning, ways that are radically different from the traditional teaching concepts.


Prior to the new partnership, Thai government has tried many directions of education reforms. Most started with some aspects of reforming schools, such as adding some computers or computer courses. But each suggestion had to fit within the existing format of school, with established culture, habits, measures, schedules, courses, texts, and way of life , thus the results were not significant. There also was the tendency to proceed with changes across the whole country.


The new partnership broke with these ways of thinking. MIT faculties believed that going deeper, concentrate on few locations as funding permits, is more important than going broadly across the country. The in depth changes could serve as examples for the broad changes in the future. Also, since schools are difficult to change from top down, the group try to create many small examples, and examples within examples. This way, Project Lighthouse hope that each small example would give rise to new and unexpected ideas, some even better than what could have been planned beforehand, providing opportunity for finding localized creative learning tools.


For instance, at the beginning of the Lighthouse Project, people believed the use of computers was a subject itself. That is, people advocating teaching the children the components of the computer, how to use it in the basic way, and teach how to use a few software packages. However, after introduction of Logo Language, people begin to embrace the view that technology and computers should be used as an expressive tool, as ubiquitous but more powerful than a pencil. Computers should be used as a means of exploring, learning about, and doing projects in other areas. Here are many creative and open projects developed by students using the computer:


  • A fifteen year old Buddhist monk using Logo and digital camera to trace the history of Buddhist history in the nearby temple, which he then placed on the web.

  • A multimedia study of traditional herbal medicine, using voice input, digital camera, and Logo to create a learning environment.

  • A program to create new variations on the local fabric pattern.


Case 2. -- Peru Ministry of Education Research Project


The Ministry of Education of Peru in 1998 conducted a research project on the cost/benefits of its education sector. The research projected involved students between 6 ad 11 years old from 130 Peruvian schools, and the research was done with the help of Pontificia University (PUC) in Peru and LEGO Education group.


The project introduced Peruvian teachers and students to apply the theory of "Constructionism" and "Learning by Making" using LEGO Education products - as opposed to traditional passive note taking, listening and repetition.


The results were exceptional: Significant improvement in self-esteem, creativity and problem solving capabilities. From independent verification and test, the student group which learning based the new learning concept of problem-solving and hands-on experience scored 100% higher on hands-on ability and mechanical construction skills. The result of the new learning concept was also seen in mathematics skills, where the LEGO student group scored higher by as much as 60%. The language skill and self-esteem also increased. Children became more active and attentive in classes, and learning become more pleasurable, and absenteeism was significantly reduced.


Why LEGO material is better?


Conventional instruction methods emphasize the memorization of facts and information. Students are tested if they can reproduce or memorize that is taught. Thus, students who are good at memorization often score well on such tests, but many of them forget as soon as the test is over. This activity is not truly Learning .


Rarely, if ever, do students get a chance to use what they are taught. Students are often told they will use this "in the future". The math and science problem sets do attempt to get students to use the subject matter presented, but such problems are geared toward getting the students to produce a specific, one "correct" answer. They are not open-ended problems, and do not encourage students to be creative. That’s why students find such problem sets BORING . Students typically quickly forget what they thought was boring subjects.


Even though the group of students in Traditional Teaching had access various scientific equipment (scales, magnifying glasses, test tubes, magnets...), these material were not used to construct anything of interest to students. Rather they are uses as cookbook-like exercise that were meant to demonstrate various scientific principles. While this approach maybe an improvement over memorization, it does not come close to that is doing science is actually like .


This is where LEGO Educational materials are different. Students in the LEGO Education Group are first presented with some very basic theoretical explanations, such as how a lever works. Then, as soon as possible, the students get a chance to use this lever, to play with it, to conduct some hands-on experiments and investigations with it, and to solve some simple problems . This is not all. Students are then asked to mobilize this new knowledge to solve several open-ended problems - problems that do not have just one answer. This is where students use their imagination and creativity, and we see real excitement and engagement on the part of students. And it is just these engagement that makes what students learned memorable. This is why the students group using LEGO Education material score higher than the traditional group: Their learning was personally meaningful, exciting, engaging, involved in producing tangible products, and tapped into their creative imaginations . As children would say, "it was hard, but it was fun!".


For older students, the open-ended question can be quite complex and sophisticated, involving computer programming and control with LEGO model building. For example, students can build a greenhouse with a door that open and close automatically if the temperature is too high. Or, a car manufacture assembly line using mechanical arms. These challenges allow students to pursue their own design, test the design, if it does not work, students need to research the books, or discuss with other students. This is what doing science is actually about. The mistakes students make and the process of making their projects work greatly develops students problem solving skills and creative thinking abilities.


Besides "Learning by Making" and the adoption of "Constructionism" teaching philosophy, the main reason LEGO Educational student group scored much higher than the Traditional Teaching group was the LEGO students Enjoyed Learning. Scientific and pedagogical research shows that being challenged to the limits of one’s ability provides the most enriching learning experience. When you are sufficiently challenged and doing something of your interest, learning becomes as natural as breathing - you don’t even realize you are doing it! The LEGO Education material can sufficiently challenge all students at different levels, you can use the same theory, for example, levers, and build a simple machine, or you could build a sophisticated factory model, all depending on your abilities.


Case 3. -- U.S.A


"Learning can be fun" - Dr. Pee Suat Hoon.


Infants and young children appear to be propelled by curiosity, driven by an intense need to explore and learn. Unfortunately, as they grow, their passion for learning often seem to shrink and learning becomes associated with drudgery instead of delight.


Dr. Pee Suat Hoon, an electrical engineering professors, describes why his Computer Programming and Application Laboratory course is popular among students, and there is high level of enthusiasm and engagement in his lab sessions .


  1. During the period of adolescence, there is heightened awareness of and need for personal autonomy and control. While students want support and feedback, they do not want to be controlled. Most of the lessons in Dr. Pee Suat Hoon’s lab are structured in such a way that students do not need to follow any written instructions. They were simply given the problem statement: Write a program to generate random 4 digit number; write a program to find the FFT of a input wave, etc" Students have to devise the approach to solve the problem. This allows students to be creative and independent, they can use whatever methods to solve the problem.


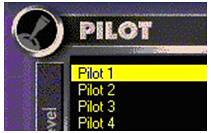
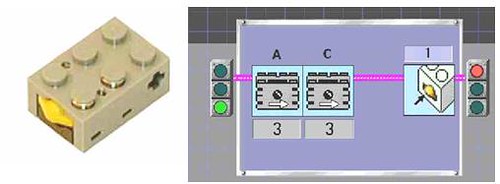
  2. Because many of students grow up with computers, they tend to like technology applications. Dr. Pee Suat Hoon uses Graphical Programming Language as the main programming tool for the lab questions, students are interested to learn the latest computer applications and development tools.


  3. Students tend to expect immediate gratification, and require immediate answers and feedback. Thus, they want to see the results of their work. Graphical Programming Language provide very user-friendly development environment that students can pick up the programming skills instantaneously. However, more time and effort is required if they wish to be expert programmers.


  4. Many students do not want to waste time doing a lot of school work. Although they like to do less work, they want work to be more meaningful to them. As learners, they want to know why they must learn something before they take time to learn it. Graphical Programming is a very useful software to learn as it is used extensively in many industries, universities, and research centers around the world. This software was used by Nobel Physicist and it is on board of the Mars Explorer for collecting data. Students are convinced that learning this software is beneficial to their future careers.


  5. Conventional labs are very structured with all instructions clearly documented. Students simply follow instructions and carry out the procedure, write down the numbers. In contract, lab courses adopting problem solving approach allow students to be creative, and they must adventure and try different things to find the solution. The sense of achievement after finding the right solution on their own is gratifying, and the success also boosts students self-confidence.


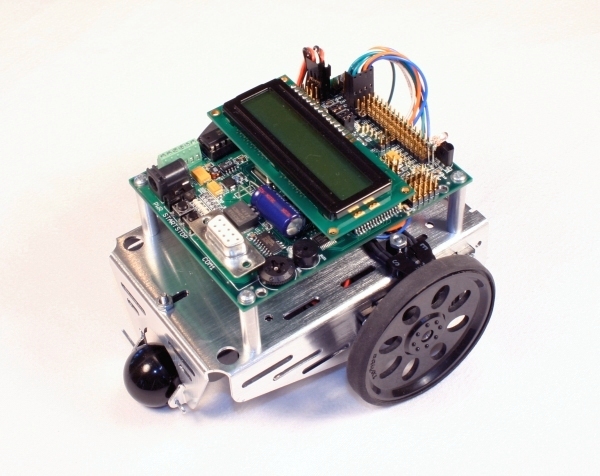
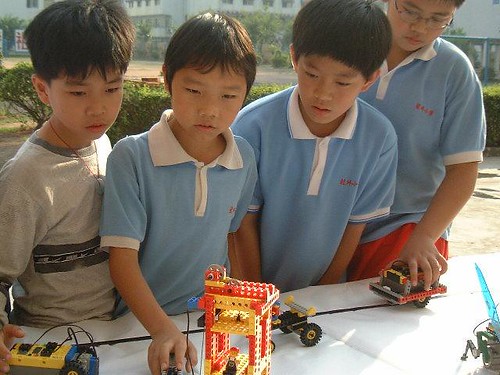
Case 4 -- International Robot Competitions - China, Korea, Australia, USA, Japan, etc"


The International Robot Olympiad Committee was established in 1998. The purpose of IROC is to foster vision of science and technology to young students. The annual robotics competitions in more than 10 countries provide a fun and exciting learning environment for students to apply their knowledge of computers technology, and unleash their imagination and creativity.


Traditional teaching methods and materials tend to limit children’s natural ability to learn by establishing specific routes by which to reach a given solution. And instead of having a variety of choices for reaching a solution students are limited to, in most cases, just one. The result is that they simply reproduce knowledge with limited creativity.

By contract, when engaged in exciting Robotics Challenges, students are given tasks that are open-ended, encouraging creativity and imaginative solutions. Learning robotics provide students with an opportunity to:


  • Explore a topic that is most appealing and challenging

  • Acquire knowledge through hands-on activities.

  • Study multiple fields of science including mechanical design, electronics engineering, and information technology.


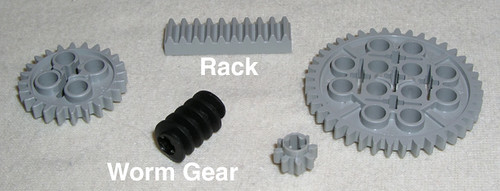
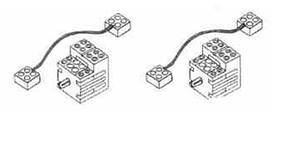
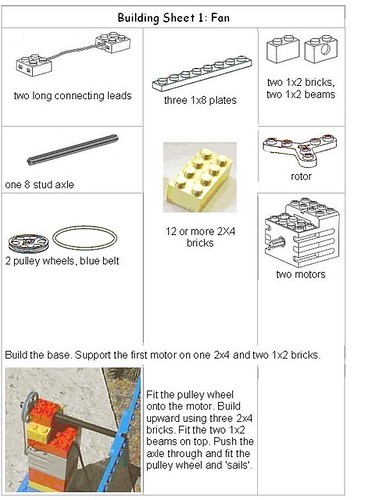
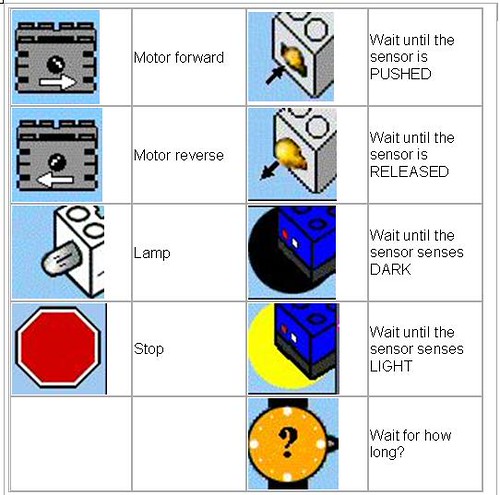
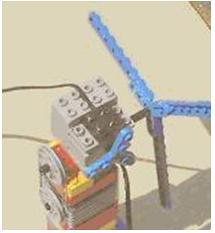
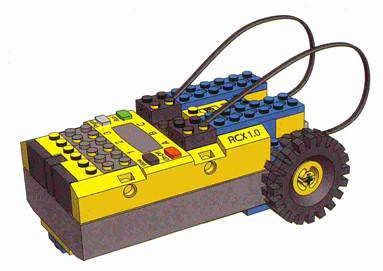
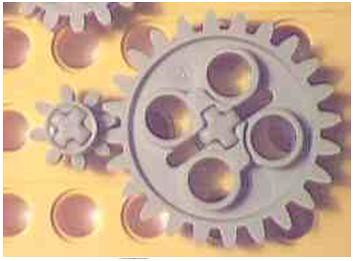
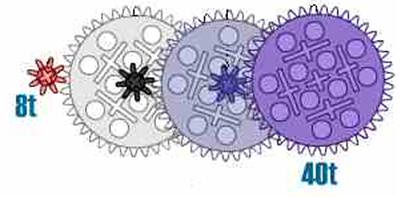
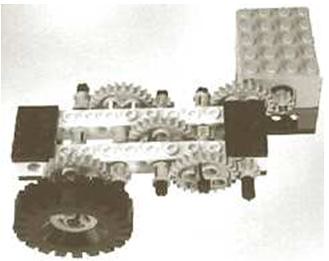
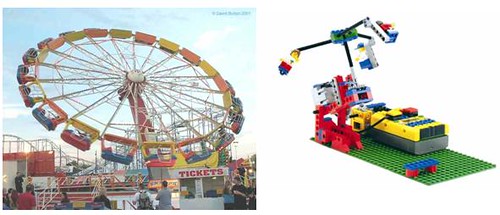
Each robotics challenge engages students in the same problem-solving process that is practiced in professional industry: research, strategize, design, build and test. Students work in teams use LEGO bricks, sensors, motors and gears to construct and program a fully autonomous robot capable of completing different missions while maneuvering around the Playing Field.


Working in an environment that encourages inquiry and hands-on experimentation, students obtain the thrill of discovery as they witness firsthand how abstract concepts become concrete solutions. Students also learn life skills such as respect for others, appreciation of different perspectives, cooperation, perseverance and time management. As a result, participants gain confidence, discover new skills and interests, and prepare them for the future challenges to come.


Conclusion


This paper briefly introduced to readers famous scientists and research organizations in the field of education. Through specific case studies and examples, the paper demonstrated different routes to more effective and better learning, especially applying Dr. Seymour Papert’s thoery of "Constructionism" and LEGO Education’s concept of "Learning by Making". The paper also emphasized on how computer technology can be used to create conditions for radically new ways of learning, including Graphical programming and robotic challenges.

Tuesday, October 14, 2008

Now Everyone can Make Robot, This is one of Robot that no need create from zero

Robotics Hardware, Software and Curriculum for Your Classroom


ItelliBrain-Bot Deluxe Robot
IntelliBrain-Bot Deluxe Robot


* IntelliBrain-Bot educational robot

* Tutorials

* Robotics class library

* RoboJDE™Java™-enabled robotics software development environment

* Integrating Java Robotics into Your Curriculum

* Beginning Robotics Course Outline

* Java Robotics in Education


ItelliBrain-Bot Basic Robot
IntelliBrain-Bot Basic Robot


IntelliBrain™-Bot


The IntelliBrain-Bot educational robot is designed to bring computer science, robotics and engineering concepts alive for students.


A course outline, an extensive collection of tutorials, example programs and Java™ robotics classes provide the resources to integrate robotics into a wide range of curriculum from introductory computer science through advanced robotics courses.


The IntelliBrain-Bot educational robot is fully Java programmable and includes the RoboJDE™ Java-enabled robotics software development environment. RoboJDE provides an easy to use programming environment that enables students to focus on programming and robotics concepts without getting bogged down in a complex development environment.


The IntelliBrain-Bot educational robot is available in two models, the IntelliBrain-Bot Deluxe kit and the IntelliBrain-Bot Basic kit. Either model may be purchased assembled or unassembled. The IntelliBrain-Bot Deluxe educational robot includes an IntelliBrain 2 robotics controller, two wheel encoder sensors, two line sensors, two infrared range sensors and an ultrasonic range sensor. The IntelliBrain-Bot robot includes an IntelliBrain 2 robotics controller and two wheel encoder sensors. Both models include a chassis, wheels and two servo motors.


if you want to get more information about that robot you can visit this page


Interesting? visit this page :


Friday, October 10, 2008

Sofware for convert WAV to RSO (NXT sound format)

RSO File


RSO is the default NXT sound format, every sound that you hear from NXT is RSO files format.


if you want to record your sound then insert it into NXT , you have to record your sound with SOUND RECORDER and save it in .WAV format, then you can use this software :


After you got your .RSO file, then you can paste it into your LEGO Mindstroms Edu NXT path , in my computer is : C:\Program Files\LEGO Software\LEGO MINDSTORMS Edu NXT\engine\Sounds


Now you can hear your own sound in NXT... :)

Software for Draw Image for NXT LCD Display

Draw Image for NXT LCD Display


This Program is no need to install, you can double click it, and it will be run.. :)


After you create the image you can paste it at your NXT installation path , in my computer "C:\Program Files\LEGO Software\LEGO MINDSTORMS Edu NXT\engine\Pictures"

then your Mindstorms Edu NXT can read the picture that you just made.

just try it :)

Java Software for Control NXT Robot Through Mobile Phone

Control NXT Through Mobile Phone


If you want to control your NXT robot through bluetooth connection in your Mobile Phone


you can download the program here :


LEGO® MINDSTORMS® NXT
Mobile Application
User Guide


OVERVIEW


This software enables a number of specific mobile phones to control the NXT by Bluetooth. The list of
phones currently supporting the NXT Mobile Application is available are :


THE PHONES IN THIS COMPATIBILITY MATRIX HAVE ALL BEEN VERIFIED TO WORK WITH THE NXT MOBILE APPLICATION.

NOTE THAT NOT ALL PHONES SUPPORT ALL FEATURES.


Model
Remote Control
Program Control
Playing Sound
Taking Images
Datalogging
Firmware1
Notes
NOKIA

Official website: http://www.nokia.com/
6680 Yes Yes Yes No Yes 4.04.07 -
3230 Yes Yes No Yes Yes 3.05.05.2 -
SONY ERICSSON

Official website:
http://www.sonyericsson.com
W800iYesYesNoNoYesR1AA008-
W550iYesYesYesNoYesR4BA041-
K610iYesYesYesYesYesR1CB001-
K800iYesYesYesYesYesR1CB001Screen resolution must be 176x208 pixels
K750iYesYesNoYesYesR1N035-
Z710iYesYesNoNoYesR1DA018-
Z550iYesYesYesYesYesR6BA033-
K510iYesYesYesYesYesR4CH003Screen resolution must be 128x128 pixels
BENQ-SIEMENS

Official website:
http://communications.siemens.com/
CX75YesYesNoYesYesN/A-
S65YesYesNoNoYesN/A-


DISCLAIMER


This software is provided as-is without any warranty of any kind. The entire risk arising out the use or
performance of the software remains with you. To the maximum extent permitted by applicable law, in
no event shall the LEGO Group of Companies (including, but not limited to LEGO Systems A/S) and its
suppliers and licensors, be liable for any damages arising out of the use or inability to use the software.
To install and use the software, you must agree to the terms of the License Agreement included with the
software. Please be sure to read the License Agreement (EULA) before installing LEGO MINDSTORMS
NXT Mobile Application on your phone.


SYSTEM REQUIREMENTS


MINDSTORMS NXT
The NXT Mobile Application is supported by NXT bricks with the following versions or later:
FW 1.03

AVR 1.01

BC4 1.01

(You can find your version numbers on the NXT brick under 'Settings'...'NXT Version')


MOBILE PHONE
Your phone must be Bluetooth enabled and capable of running Java (JSR-82). Phones listed in the NXT
Mobile Application Compability Matrix currently supports the NXT Mobile Application:


Make sure that your operator allows third party applications and that your phone's settings allow
installation of java. You may have to change your phones settings to permit the use of Java applications
(consult your phone’s instructions manual).


Following the instructions in this document requires a Bluetooth enabled computer to install the NXT
Mobile Application on your phone.


DOWNLOAD AND INSTALLATION


  1. First check that your phone supports the NXT Mobile Applications.

    A more detailed Compatibility Matrix is included when you download the software.

  2. Download the NXT Mobile Application software package and unpack the files on your computer.

  3. Make sure Bluetooth is turned on your phone and the NXT

  4. Locate the NXTmobile.jar file specific for your phone (make and model is indicated by folder names)
    and install it on your phone:


PC: Find the downloaded application and right click the file. Choose 'Send to' in the context menu and
select 'Bluetooth unit'. Find and select your device and follow the instructions for your phone.


MAC: Click the Bluetooth icon in the top menu and choose 'Send file'. Find the NXTmobile.jar file in the
zip-file you have downloaded and click 'Send'. Find your phone on the devices list and click 'Send'.
Follow the instructions for your phone.


UNINSTALLING THE NXT MOBILE APPLICATION


Please refer to the instructions manual that came with your phone for detailed instructions on how to
uninstall programs. Usually you just need to delete the program file from your phone.


GET CONNECTED


1. Start the NXT Mobile Application on your phone by navigating to the folder where you saved it (most
commonly 'games' or 'applications') and choose the application. When launching the mobile application
it will automatically search for NXT devices during start-up. The first time you connect a new NXT you
need to pair the NXT and NXT Mobile Application:


- On the NXT: Accept the connection by choosing the checkmark (notice the passkey)

- On the Phone: Enter the passkey (default passkey from the NXT is 1, 2, 3, 4)


Next time you start up the NXT Mobile Application and it finds your NXT you just need to select it and
you are ready.

Tip: Personalize your NXT and your Phone by giving them unique names. This will help avoiding
confusion when other NXT's or phones when they are in range of the Bluetooth connection.


BASIC USAGE


When the NXT Mobile Application is started you have the following options from the Main Menu:


Info


A brief description of the NXT Mobile Application, where to find help and more information - and the
terms for using the software.


Remote Control


This enables you to control two motors on the NXT. Use the joystick/command wheel on your phone to
go forward, backwards, stop - or you can choose to control one motor at the time. If your NXT model
have wheels (like the Tribot) it will be much like a remote controlled car.
See ‘Advanced Usage and Program Examples’ for more advanced remote control.


Program Control


This mode enables you to control any of the programs on your NXT. First select the program you want
to control and then you can send command messages to your NXT by pressing the numeric keys on
your phone. What the NXT does when you press the keys depends entirely on your program.
Tip: Download the two program examples included with the NXT Mobile Application for an easy
introduction to program control (see the ‘Advanced Usage and Program Examples’)


Collected Data


If the NXT can make your phone take photos, this is where you can find them. Have you made a
program that sends data to your phone, this is where you can find it as well, for instance be readings
from the sensors.


Note: Collected data and images are deleted from the camera when you close the application.

MINDSTORMS NXT Bluetooth Compatibility Matrix


Bluetooth Device Name


Compatibility

Abe UB22S
YES
Belkin F8T003 ver. 2 (short range)
YES
BlueFRITZ! AVM BT adapter, BlueFRITZ! USB v2.0
YES
Cables Unlimited USB-1520
YES
Dell TrueMobile Bluetooth Module
YES
Dell Wireless 350 Bluetooth Internal Card
NO
Dlink DBT-120
YES
MSI Btoes
YES
MSI StartKey 3X-faster
YES
TDK GoBlue
YES
Qtrek, Bluetooth USB Adapter v2.0
YES


ADVANCED USAGE AND PROGRAM EXAMPLES


REMOTE CONTROL


In addition to using the joystick/command wheel to control the motors you can use the keys on your
phone:


[1] [4] [7] and [*] controls motor A

[2] [5] [8] and [0] controls motor B

[3] [6] [9] and [#] controls motor C


Using the keys will enable you to make finer adjustments to the motors than using the joystick. For
instance making a vehicle turn in greater curves or controlling all three motors at a time.


Example


Pressing [3] will activate forward movement of the motor on port C. Pressing [6] will start the motor on
port C and pressing [6] repeatedly will increase the speed. Pressing [9] will decrease the speed. To
stop the motor, press [3]


To activate backwards movement of the motor on port C press [#]. Again, pressing [6] will increase
speed and [9] will decrease the speed in backwards direction. Pressing [3] will stop the motor.

Tip: To stop and reset the motors press the joystick/command wheel.


You can change the default motor setup by choosing 'Options' in Remote Control mode. Default is
motor B+C but if your model is wired differently you can change the motors you control with Remote
Control.


PROGRAM CONTROL


During start-up the NXT Mobile Application retrieves all program names from your NXT so they are
available for controlling. You can activate a program on the NXT by selecting the 'Options' menu on your
phone or you can use the following shortcuts to activate programs:
On the joystick/command wheel: Up, Down, Left, Right
On the keypad: [*] [+] [#]


To customize the shortcuts:

1. Choose 'Options'

2. Highlight the program you want to move and press 'More' followed by 'Move Prg'

3. Highlight the key you want to assign to the program and choose 'More' followed by 'Place Prg'


When you have activated a program you can send messages to it by pressing the numeric keys from
[0] to [9]


Examples


Open the two test programs using with the MINDSTORMS NXT Software and transfer the programs to
your NXT by pressing the download button.

(See the NXT User Guide that came with your MINDSTORMS set for details on how to download
programs to the NXT)


SendMsg.rbt


Attach the touch sensor to port 1. If the sensor is pressed the NXT will send a message to your phone to
take a picture (this will only work if your phone has a build in camera)

Attach the touch sensor to port 2 and press it. This will make your Phone play a tune
On port 3, pressing the touch sensor will make the NXT send a text message to your Phone: ‘hello’

TIP: You can review the data your phone receives in 'Collected data'.


RecieveMsg.rbt


Pressing [1] [2] or [3] on the phone will make the NXT say the number pressed.

Tip: Try to customize the two test programs to learn more about how to make programs compatible with
the NXT Mobile Application.


source : www.lego.com

Tuesday, October 7, 2008

Robot Chess

This Project is written with Visual Basic 2005 (VB.net) , Java , and Lego Mindstorms Edu NXT from 6 June 2008 - 20 December 2008


This robot can play chess with human automatically, it can think 6 step ahead with thousand of mathematic combination and calculation.


And the material is 100% Lego , except Webcam,Laptop,and Chess Components..


this is the video :


This Project is Created By :

Programmed By : Ali Sanjaya
Constructed By : William
Idea : Mr.Bambang Rusli

source : www.mikrobot.com

Rubic Solver Robot

This Robot is 100% created with Lego , and The Program is written with Java, Visual Basic 2005 (VB.NET) and Lego Mindstorms Edu NXT


This Robot Created at 2007 (finish in 5 month)

this is the video :


Created By :
Programmed By : Ali Sanjaya
Constructed By : William
Idea : Mr.Bambang Rusli
source :www.mikrobot.com

GEARS COMBINATION

GEARS

By Jim McGinn & Kristoph Minchau


Terms


Force: How hard something pushes.

Torque: How hard something that is turning, pushes.

So a force tries to push something, and a torque tries to turn something.


Uses of Gears in Robotics


Motors have low torque and high speed. Usually we need high torque and low speed. Gears are used:


  • To convert the motion from a fast electric motor that has low torque, to a slow motion with high torque (which is useful to push a robot).

  • To transfer motion from one shaft to another while keeping the shafts sychronized.


tamiya


The white gear box above transfers the motion of the left shaft, to the right shaft, and keeps them synchronized. The motor/gearbox (in the lower left corner) is a Tamiya.


How Gear Work


If you turn the small gear, the big gear goes slower.

If you turn the big gear, the small gear goes faster.

The slow one has more torque (it can push harder). This is good for moving robots, arms, etc.

The fast one has less torque, but more speed. This is good for fans and anything where you need speed but not much torque.

By using a series of gears, called a "gear train," you can get speed reductions of 1 to several hundred (eg. 1:250).


Figuring Out The Gear Ratio


Gears work as if they were wheels rolling against each other, with the wheel diameter equal to the Pitch Circle Diameter. In other words, the "effective wheel diameter" of a gear is the Pitch Circle Diameter.


If you have two gears, the Speed of the slower (bigger) gear = the Diameter of the smaller gear / Diameter of the larger gear * the Speed of the smaller gear.

Choosing Gears


If you need to build a gearbox, you must use gears that "work together." This means they must have the same "diametral pitch" and "pressure angle."


Diametral Pitch

Diametral Pitch (or just "Pitch") P = Number of teeth / Pitch Diameter.

The Pitch Diameter Circle goes to approximately half way up the height of the teeth.

pitch diameter


Common (diametral) pitches are 12 (big teeth), 24, 32, 48, 64 (fine teeth).


Knowing the pitch diameter is very useful. To figure out how far apart the shafts of two gears should be, add the pitch radius of the first gear with the pitch radius of the second gear.

distance between 2 gear


The teeth of the gears actually roll against each other- they do not slide:

gear how they roll


Putting the gears the correct distance from each other (not too close or too far), minimizes the stress and maximizes the life of the gears.


TIP: How To Figure Out The Exact Pitch Diameter of a Gear (Imperial)

When scrouging IMPERIAL gears, estimate the pitch diameter, count the number of teeth, then divide the number of teeth by the pitch diameter to get the approximate (diametral) pitch.

Figure out what pitch the gear is by assuming it is one of these 12, 24, 32, 48, 64. (Note: If it is not close to one of these, it may be a metric gear or a non-standard gear.)

Then take the number of teeth, and divide it by the exact pitch, to get the exact pitch diameter.

If you can't determine the exact pitch diameter, estimate it, and make sure the mating gears are not jammed tight together. In the diagram under Backlash below, note that the top of the teeth do not touch the base of the teeth in the other gear.


Pressure Angle

When the teeth of two gears touch, the point where they touch is at a bit of an angle (from the radius). Both teeth must touch at the same angle for the gears to work as they were designed.

In practice, if you are building a small robot (like a mini-sumo) with plastic gears that you have scrounged, don't worry about this. If two gears don't have the same pressure angle, they will wear out faster, but for small robots that are not used that much, this probably will not be a problem.

If you are building a big robot, or if you are buying the gears, make sure they have the same pressure angle. 20 degrees is the most common, but some gears are 14.5 degrees.


Types of Gears


Spur gears are the "normal" gears. You can also get rack, worm, and bevel (not shown) gears, as well as other uncommon gears.

pitch diameter


Backlash


When your motor switches direction, the gears have to move slightly before they contact the other teeth. This called "backlash." With a gear train with lots of gears, it is quite noticeable. This can be a problem in robotic arms.

pitch diameter


Recommendations


It is easiest to use a "gear head" motor. This is a motor with a built-in gearbox (or it comes with a gearbox that you have to put on it, like the Tamiya motor/gearboxes). The Tamiya motor/gearboxes available from HVW Tech are a good place for many beginners to start.


If you need to build a gearbox, make sure the holes for the shafts are placed precisely (see Diametral Pitch above). Don't jam them together.


Lego gears work very nicely.


PM Hobbies usually has a limited selection of general purpose plastic gears. Old printers and VCR's have gears. Never throw these out without scrounging the gears. (Keep the springs, also.)


If you want to learn more about gears, the Lego Mindstorms set is great for experimenting. You can build lots of different gear arrangements with this. Also check the Internet for Lego gear ideas.


*Diagrams are from Mechanisms and Dynamics of Machinery, by H.H. Mabie and F.W. Ocvirk, 1978.

Monday, October 6, 2008

LEGO LESSON PLAN

Lego Amusement Park


LEGO®, Technic,Mindstorms, Robotics Invention System, and RCX are trademarks of the LEGO® Group of companies,which does not sponsor, authorize or endorse this site. Visit the official LEGO® website at http://www.LEGO.com.


alisanjaya alisanjaya


5th Grade Lesson Plans


The following set of lesson plans were created by Mrs. Kenya Taylor-Wash and Mr. Alan Mays, 5th grade teachers at Otis E. Brown School #20, Indianapolis Public Schools. The plans utilize Lego Mindstorms and Robolab software and are the culmination of a format that was originally designed for use in a "camp" setting, where the children were allowed to work on projects for approximately 5 hours a day over a 1-week period. Mrs. Taylor-Wash and Mr. Mays reconfigured some of these projects, reducing them to a two-week set of lessons that require approximately 1.5 hours per day. All of the lessons integrate math, science, and language arts and cover numerous Indiana State Standards.


This project was funded by an Institute of Electrical and Electronics Engineers Foundation grant. The grant and the "camp" format were designed and taught by Professor William Conrad, School of Engineering and Technology, Indiana University Purdue University Indianapolis (IUPUI). This particular class, Lego Robotics was offered to children in grades 5-8 through the IUPUI Young Scholars program, a summer program administered by the IUPUI School of Education. The Young Scholars Programs offer various educational opportunities for children in grades 1-12.


Day 1

Lego Construction Parts


Essential Skills: Students will be able to distinguish between a brick, beam, plate, bushing, axle, tire, hub, and pulley; utilize pieces in the kit to give outcomes of experimental probability; use journals to reflect on the lesson.


Engagement Activities:

  1. Place students in small groups (pairs if possible).

  2. Using the pieces from both kits, each group will compete to create a free-standing tower.

  3. Introduce vocabulary terms: brick, beam, plate, bushing, axle, tire, hub, and pulley. Students will match each picture to the appropriate term. Students will verbally explain the relationship between bricks, beams, and plates (Example: What is the difference between a 1 X 8 plate and a 1 X 8 beam?).

  4. Present a mini lesson on probability. Students will verbally explain the ratio of certain pieces in comparison to the whole group. (Example: 4 red beams out of 22 beams, 4/22)

  5. Present a mini quiz on vocabulary terms, relationship of pieces, and probability.

  6. Students will write in their journals about what they have learned and what they would like to learn in the next lesson.

  7. Allow time for students to clean their areas and put all parts away.

Assessment: teacher observation, mini quiz, journal writing

Adaptations: teacher proximity, cooperative grouping

Materials: Mindstorms For Schools, Robo Technology Set and Amusement park set, Robolab 2.5 Software, attached pictures and worksheets

Math Standards: 5.4.9, 5.6.1, 5.6.4

Reading/LA Standards: 5.5.6

Science Standards: 5.2.3, 5.2.4, 5.5.1, 5.2.7, 5.2.8


Construction Parts List


Paste the picture to match the words.


Axle
Tire
Hub
1 x 4 Plate
2 x 6 Plate
1 x 10 Beam
2 x 8 Brick


Day 2

The RCX Box


Essential Skills: Students will be able to identify the RCX box and become familiar with the information on it; identify wires and recognize the differences in size; identify the motors and determine the direction the motor turns and how to reverse the direction it turns; use journals and handouts to reflect on the lesson.


Engagement Activities:

  1. In the same small groups introduce the students to the RCX box. Read through the Introduction to RCX with students.

  2. Have students read through and complete handouts 3A-4A. Conduct a whole group discussion.

  3. Students are to create a movable object using LEGOS and the RCX box.

  4. Students will write in their journals about what they have learned.

  5. Allow time for students to clean their areas and put all parts away.


Assessment: teacher observation, journal reflections

Adaptations: teacher proximity, cooperative grouping

Materials: Mindstorms For Schools, Robo Technology Set and Amusement park set, Robolab 2.5 Software; handouts attached

Math Standards: 5.4.9

Reading/LA Standards: 5.2.1, 5.2.2, 5.2.4, 5.4.5, 5.5.6

Science Standards: 5.2.3, 5.2.4, 5.2.7, 5.2.8, 5.5.1


Introduction to RCX


The RCX is a programmable LEGO brick which can control motors and lights and process input from sensors.


RCX


1. Open the RCX by pulling the back cover from the rest of the unit.


RCX


2. Insert 6 AA batteries then replace the back cover or use a transformer adapter.


Batteries


3. Find two motors and two wires in your kit.


Motors


4. Attach one end of each wire to each of the motors.


Wire


5. Attach the other end of each wire to the RCX unit, to Ports A and C


Ports


A, B, & C are Output Ports which are connection points for LEGO motors and other peripherals such as lamps.


LEGO


6. Find two of the smallest wheels in your kit and attach one to each end of the axle on the motor. (This makes it easier to watch the direction of rotation.)


The RCX can store 5 programs at time. The first 2 are demonstrations. You should use programs 3, 4, or 5 for your programs.


7. Press the red on-off button. What happens?


Program


8. Press the Prgm button until a 1 appears. What do you think Prgm means?


Press


9. Press Run to run built-in Program 1. What happens?


Run


10. In which direction do the motors turn? (clockwise or counterclockwise)


11. Press the Run button again. What happens?


12. Switch the wire connection on Port A 180o. Run the program again. In which direction does the motor connected to Port A turn now?


Wire Connection


13. Try the same with Port C. Explain what Program 1 can do.


Day 3

Constructing a Fan


Essential Skills: Students will identify the parts needed to construct a fan; problem solve by following appropriate directions; use visual cues to judge appropriate construction; select pre-programming options to set the fan in motion; use journals to reflect on the lesson.


Fan


Engagement Activities:

  1. Present handout Building a Fan and guide students to identify the parts needed for construction.

  2. In small groups students will build a fan.

  3. Once the fan is constructed, students will write in their journals. They are to explain the process of building a fan.

  4. Students are to keep their fan intact for the next lesson.

  5. Allow time for students to clean their areas and put all parts away.


Assessment: teacher observation, journal reflections

Adaptations: teacher proximity, cooperative grouping

Materials: Mindstorms For Schools, Robo Technology Set and amusment park set, Robolab 2.5 Software; handouts attached.

Math Standards: 5.4.9

Reading/LA Standards: 5.2.1, 5.2.2, 5.2.4, 5.5.6

Science Standards: 5.2.3, 5.2.7, 5.5.1, 5.2.7, 5.2.8, 5.6.1, 5.6.4


Building a Fan


Building a Fan


Day 4

Robolab Programming


Essential Skills: Students will be able to use visual clues to decide on appropriateness of desired icons; use reading strategies to understand material written for a specific purpose; write a simple program using icons; maintain written records; work cooperatively and collaboratively.

Engagement Activities:


  1. In small groups students will return to their fans.

  2. Present the visual icons from the pilot level. Students will read through and discuss the different icons and what they represent.

  3. Students will follow instructions on handout pilot level 1 while recording their observations. Initiate whole group discussion.

  4. Have students follow instructions on handout pilot level 2, while recording observations. Initiate whole group instruction.

  5. Students are to disassemble the parts and clean up their areas.


Assessment: teacher observation, written observations, journal reflections

Adaptations: teacher proximity, cooperative grouping

Materials: Mindstorms For Schools, Robo Technology Set and Amusement park set, Robolab 2.5 Software; computers; handouts attached

Math Standards: 5.2.6, 5.7.1, 5.7.2, 5.7.3

Reading/LA Standards: 5.2.2, 5.5.6

Science Standards: 5.2.3, 5.2.4, 5.2.8, 5.5.1, 5.5.6


Icons from the Pilot Levels

Pilot Level


Pilot Level 1


We are going to send instructions to the RCX to turn the fan's main sails.


  1. Connect the sails motor to Output A on the RCX.

  2. Load Pilot Level 1 by clicking on the main menu screen:


    Load Pilot 1

    This is what you will see:


    You Will See


    Don't change the icons! What do you think this program will do?
  3. Place the RCX close to the IR Tower. Turn the RCX on. Click the arrow:


    Arrow


    This sends your instructions to the RCX. Watch the screen to see it downloading.

  4. Press Run on the RCX. What happens? Is this what you expected?

  5. Click on the motor icon to change the direction in which the sails turn. Click on the timer to choose how long you want the motor to run for. Send your program to the RCX and press Run.

  6. Describe what happens to the fan:

  7. Change back to the original direction. Make the sails turn for 10 seconds. Draw the icons which are on the screen:


Pilot Level 2

Your activity is to write a program for the RCX to set the speed and direction of the fan's main sails, and turn the fantail.

  1. Connect the sails motor to Output A on the RCX. Add a new motor (fantail motor) at the top of the base as shown below. Connect the fantail motor to Output C on the RCX.


    Sail Motor


  2. Load Pilot Level 2 by clicking on the main menu screen:


    Sail Motor


    This is what you will see:


    Clicking Main Menu


  3. Change the program to turn the fantail (connected to C). Click the lamp icon and change it to a motor.

  4. Click on the touch sensor icon, and change it to a timer.

  5. Place the RCX close to the IR Tower. Turn the RCX on. Click the arrow to download, then press Run on the RCX.

  6. Change the program so that the sail motor (A) turns rapidly and the fantail motor (C) turns slowly. Download and press Run on the RCX.
    Which speeds did you select for the sails and fantail?


Day 5

Build and Control a Basic Car


Control a Basic Car


Lego Mindstorms for schools 9785, 9786 Lego Educational Division, pp7.

Essential Skills: Students will be able to identify parts needed to construct a basic car; use visual cues to judge appropriate construction; create a program to set the car in motion; write in journals to reflect on the lesson.

Engagement Activities:


  1. In small groups students will follow instructions to Build a Basic Car. Use booklet #9725 (steps 1-6, add wheels).

  2. Using pilot 2, program the car to run at speed 5 for 2 seconds. Students will use a yard stick or tape measure to record the distance the car traveled. Discuss the differences in times and why the cars where not able to move the same distance.

  3. Write a prediction as to how far the car will travel in half the time. Reprogram the car to run for 1 second. Record the distance. Discuss the results and possible reasons for inconsistency.

  4. Use different wheels and repeat steps 2 and 3.

  5. Disassemble car.

  6. Write reflections in journals.

  7. Clean work area.


Assessment: teacher observation, journal reflections

Adaptations: teacher proximity, cooperative grouping

Materials: Mindstorms For Schools, Robo Technology Set and Amusement park set, Robolab 2.5 Software; booklet number 9725; computers; yardstick or tape measure; handouts attached

Math Standards: 5.2.1, 5.2.6, 5.4.9, 5.7.1, 5.7.2, 5.7.3

Reading/LA Standards: 5.2.1, 5.2.2, 5.5.6

Science Standards: 5.5.1, 5.2.3, 5.2.7, 5.2.8, 5.5.1, 5.6.1


Day 6

Gears


Essential Skills: The student will be able to distinguish between several kinds of gears, develop ratio statements for speed variance vis-à-vis small gear (8-tooth gear) to larger gear (i.e., 24-tooth gear), construct a gear train from given directions, use multiplication to achieve ratios for the constructed gear train, write in journals to reflect on the lesson..

Engagement Activities:


  1. Introduce the gear pages (following this lesson plan), and have the students identify and match each piece with a part in the Mindstorms Kit.

  2. Discuss the different kinds of gears (as identified by the number of teeth).

  3. Have the students record the number of times an 8-tooth gear has to turn to make a 24-tooth gear go around one time. (3 times)

  4. Explain and demonstrate that adding an 8-tooth gear on the same axle as the 24-tooth gear means that both gears will turn at the same number of revolutions

  5. Explain and demonstrate that adding a new axle with a 24-tooth gear has the same effect as in step 3. To prove this, have the student record the number of times each of the 8-tooth gears has to turn to make the new 24-tooth gear turn around only once. (1st one has to turn 9 times; 2nd has to turn 3)

  6. Discuss and demonstrate the gear box (use picture) and how the ratio of 243:1 is achieved.

  7. Have students build their own gear boxes (according to the picture).

  8. Use journals to record the number of time the 1st gear has to turn to make the last gear go around once. Write reflections about these numbers.

  9. Clean work area. Leave gear trains intact. Be sure to replace all other Lego parts in proper storage areas.


Assessment: teacher observation/gear boxes/journal entries and reflections

Adaptations: teacher proximity/cooperative grouping/hands-on manipulative exercise

Materials: Mindstorms For Schools, Robo Technology Set and Amusement park set, Robolab 2.5 Software; computers; handouts attached

Math Standards: 5.2.1, 5.2.6, 5.4.9, 5.6.3, 5.6.4, 5.7.1, 5.7.2, 5.7.3, 5.7.5, 5.7.6, 5.7.7, 5.7.8, 5.7.9

Reading/LA Standards: 5.2.1, 5.4.1, 5.4.5, 5.5.6

Science Standards: 5.1.1, 5.2.3, 5.2.4, 5.2.6, 5.2.7, 5.5.1, 5.6.4, 5.3.12


40 tooth gears

40 tooth gears


24 tooth gears


24 tooth gears


16 tooth gears


16 tooth gears


8 tooth gears


8 tooth gears


3 to 1 gear ratio


3 to 1 Gear Ratio


The 8 tooth gear must rotate 3 times to make the 24 tooth gear rotate once.


Two Gears on the same axle


Gears on the Same Axle


Both the 24 tooth gear and the 8 tooth gear are on the same axle. Therefore both gears will rotate the same number of revolutions. This means that if the 8 tooth gear goes around 3 times, so does the 24 tooth gear.


Gear Trains


A group of gears connected together is called a gear train. This allows a much larger gear ratio.


Gear Train


Determine how many times that the small 8 tooth gear on the left has to turn to make the large 40 tooth gear on the right turn one revolution.


A 243 to 1 Gear Train using 8 and 24 tooth gears
Gear Train


Day 7

Snail Car


Essential Skills: The student will be able to identify parts needed to construct a snail car of their own design; use visual cues to judge appropriate design aspects; construct and attach a gear train to make the car go slowly; create a program to set the car in motion; compete against groups to see who has the slowest car; write in journals to reflect on the lesson.

Engagement Activities:


  1. In small groups students will design a basic car that will allow for the attachment of the gear train they built last time (see picture of gear train to gain ideas of motor and wheel attachment). For basic car constructions see booklet #9725.

  2. Using pilot 1, build a program that will allow the motor to run for a specified length of time. Program the car to run for 500.00 (500 seconds). If the students use a gear ratio that is approximately 250/1 the car will take longer than 500 seconds to travel 12". In that case have them wire and program a push button sensor to input 2. Since the sensor will not be pressed the car will run forever.


    Snail Car


  3. Use additional pieces to decorate cars.

  4. Hold a competition between the groups to see which car will travel the slowest. (Use electrical tape to display a start line and a finish line twelve inches apart).

  5. Disassemble the car.

  6. Write reflections in journals.

  7. Clean work area.


Assessment: teacher observation/snail cars/competition/journal reflections

Adaptations: teacher proximity/visual cues/manipulative exercises/cooperative grouping

Materials: Mindstorms For Schools, Robo Technology Set and Amusement park set, Robolab 2.5 Software; computers; handouts attached

Math Standards: 5.2.6, 5.4.9, 5.7.1, 5.7.2, 5.7.3

Reading/LA Standards: 5.2.1, 5.2.2, 5.5.6

Science Standards: 5.2.3, 5.2.7, 5.5.1, 5.2.8, 5.6.1


Day 8

Merry-Go-Round (Enterprise)


Merry Go Round


Essential Skills: Students will identify parts needed to construct merry go round (part of the LEGO amusement park); describe the relationship between beams and axles; use problem solving skills and visual cues to judge appropriate construction; run a pre-existing program; write reflections in journals.

Engagement Activities:


  1. With students in groups, conduct a discussion of all the steps necessary to build the merry go round (student booklet 9725).

  2. Verbally quiz students on the relationship between axles and beams. (Example: a size 10 axle will have the same length as a 10 unit beam)

  3. Follow the steps in booklet 9725 to build the merry go round.

  4. Use program pilot level 3 (amusement park, merry go round 1) to set the creation into motion.

  5. Leave the merry go round in tact.

  6. Clean area.

  7. Write reflections in journals. Prompts: Which part of the lesson did you enjoy the most? Explain. Which park of the lesson did you like the least? Explain.


Assessment: teacher observation, journal reflections

Adaptations: teacher proximity, cooperative grouping

Materials: Mindstorms for Schools, Robo Technology Set and Amusement park set, Robolab 2.5 Software; computers
;
Math Standards: 5.2.6, 5.7.1, 5.7.2, 5.7.3, 5.7.7, 5.7.9

Reading/LA Standards: 5.2.1, 5.2.2, 5.5.6

Science Standards: 5.1.1, 5.2.3, 5.2.4, 5.2.7, 5.2.8, 5.5.1, 5.6.4


Day 9

Merry-Go-Round Part 2


Essential Skills: The student will be able to write and run a program; build and program a creation using an additional motor; record new discoveries; write in journals to reflect on the lesson.

Engagement Activities:


  1. Use pilot level 4 to program the merry go round to tilt up and down, and turn right and left.

  2. Test the program.

  3. Program the merry go round to turn right and at the same time tilt up, then turn left and at the same time tilt down. Test the program.

  4. Use another motor to create an additional amusement park ride.

  5. Record the directions needed to build the new creation

  6. Place the new ride on the same plane as the merry go round.

  7. Disassemble the parts.

  8. Clean the area.

  9. Use journals to write reflections.


Assessment: teacher observation, journal reflections

Adaptations: teacher proximity, cooperative grouping

Materials: Mindstorms For Schools, Robo Technology Set and Amusement park set, Robolab 2.5 Software; computers

Math Standards: 5.2.6, 5.7.1, 5.7.2, 5.7.3, 5.7.7, 5.7.9

Reading/LA Standards: 5.2.1, 5.2.2, 5.5.6

Science Standards: 5.1.1, 5.2.3, 5.2.4, 5.2.7, 5.2.8, 5.5.1, 5.6.4


Day 10

Design Project


Essential Skills: The student will be able to work cooperatively in groups; construct a final project, using a pre-determined design or a design of their own creation; create a computer program to motivate their design; use writing skills to produce a written document, specifying "how-to" directions on building their group’s project.

Engagement Activities:


  1. Each group will decide on a final project (They may choose items from previous activities, items from other LEGO booklets, or items of their own creation).

  2. Students will build their project.

  3. Each group will write a program to make their project move.

  4. Teacher will collect all directions (from students who constructed pre-designed projects).

  5. Each individual student will write step-by-step, "how-to" directions for constructing the group project.

  6. Keep projects intact for school-wide sharing.


Assessment: teacher observation, how-to directions

Adaptations: teacher proximity, cooperative grouping

Materials: Mindstorms For Schools, Robo Technology Set and Amusement park set, Robolab 2.5 Software; computers, LEGO instruction booklets

Math Standards: 5.2.6, 5.7.1, 5.7.2, 5.7.3, 5.7.7, 5.7.9

Reading/LA Standards: 5.2.1, 5.2.2, 5.5.6

Science Standards: 5.1.1, 5.2.3, 5.2.4, 5.2.7, 5.2.8, 5.5.1, 5.6.4


source : www.lego.com